Học đôi chút về TimelineLite TimelineMax cho các filter trong HTML
11th Feb 2022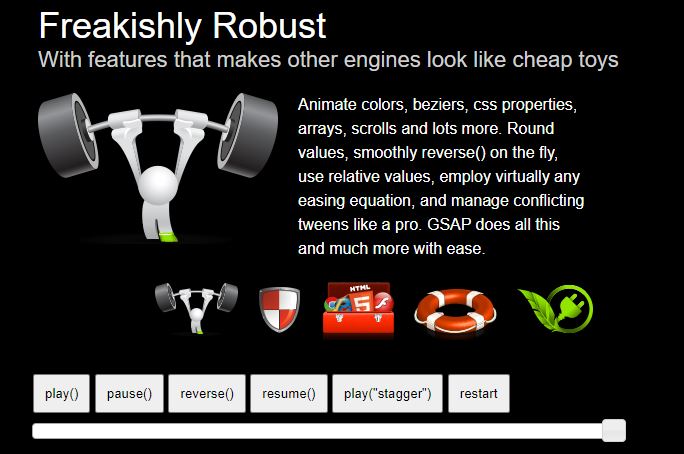


Table of contents
TimelineLite is a lightweight, intuitive timeline class for building and managing sequences of TweenLite, TweenMax, TimelineLite, and/or TimelineMax instances. You can think of a TimelineLite instance like a container where you place tweens (or other timelines) over the course of time
- build sequences easily by adding tweens with methods like
to(),from(),staggerFrom(),add(), and more. - tweens can overlap as much as you want and you have complete control over where they get placed on the timeline.
- add labels,
play(),stop(),seek(),restart(), and evenreverse()smoothly anytime. - nest timelines within timelines as deeply as you want.
- set the progress of the timeline using its
progress()method. For example, to skip to the halfway point, setmyTimeline.progress(0.5); - tween the
time()orprogress()values to fastforward/rewind the timeline. You could even attach a slider to one of these properties to give the user the ability to drag forwards/backwards through the timeline. - speed up or slow down the entire timeline using
timeScale(). You can even tween this property to gradually speed up or slow down. - add
onComplete,onStart,onUpdate, and/oronReverseCompletecallbacks using the constructor’svarsobject. - use the powerful
add()method to add labels, callbacks, tweens and timelines to a timeline. - base the timing on frames instead of seconds if you prefer. Please note, however, that the timeline’s timing mode dictates its childrens’ timing mode as well.
- kill the tweens of a particular object with
killTweensOf()or get the tweens of an object withgetTweensOf()or get all the tweens/timelines in the timeline withgetChildren() - If you need even more features like,
repeat(),repeatDelay(),yoyo(),currentLabel(),getLabelsArray(),getLabelAfter(),getLabelBefore(),-
getActive(), tweenTo()and more, check out TimelineMax which extends TimelineLite.
Ví dụ Code
//instantiate a TimelineLite
var tl = new TimelineLite();

//add a from() tween at the beginning of the timline
tl.from(head, 0.5, {left:100, opacity:0});

//add another tween immediately after
tl.from(subhead, 0.5, {left:-100, opacity:0});

//use position parameter "+=0.5" to schedule next tween 0.5 seconds after previous tweens end
tl.from(feature, 0.5, {scale:.5, autoAlpha:0}, "+=0.5");

//use position parameter "-=0.5" to schedule next tween 0.25 seconds before previous tweens end.
//great for overlapping
tl.from(description, 0.5, {left:100, autoAlpha:0}, "-=0.25");

//add a label 0.5 seconds later to mark the placement of the next tween
tl.add("stagger", "+=0.5")
//to jump to this label use: tl.play("stagger");

//stagger the animation of all icons with 0.1s between each tween's start time
//this tween is added
tl.staggerFrom(icons, 0.2, {scale:0, autoAlpha:0}, 0.1, "stagger");
Ngoài ra các bạn có thể xem Youtube
The video below will walk you through the types of problems TimelineLite solves and illustrate the flexibility and power of our core sequencing tool.
>> Tìm hiểu Sequence JavaScript Animations với TimelineLite
HTML
<div id="demoWrapper">
  <div id="bg"></div>
    <div id="content">
      <h1>Freakishly Robust</h1>
      <h2>With features that makes other engines look like cheap toys</h2>
      <div id="info"><img src="//greensock.com/wp-content/uploads/custom/codepen/feature_robust.png" width="240" height="151" id="feature">
        <p id="description">Animate colors, beziers, css properties, arrays, scrolls and lots more. Round values, smoothly reverse() on the fly, use relative values, employ virtually any easing equation, and manage conflicting tweens like a pro. GSAP does all this and much more with ease.</p>
      </div>

  </div>
  <div style="clear:both"></div>
  <div id="nav"> <img src="//greensock.com/wp-content/uploads/custom/codepen/icon_robust.png" width="83" height="59"><img src="//greensock.com/wp-content/uploads/custom/codepen/icon_overwrite.png" width="43" height="59"><img src="//greensock.com/wp-content/uploads/custom/codepen/icon_compatible.png" width="73" height="59"><img src="//greensock.com/wp-content/uploads/custom/codepen/icon_support.png" width="83" height="59"><img src="//greensock.com/wp-content/uploads/custom/codepen/icon_plugin.png" width="76" height="59">
      </div>
  <div>
  <button id="play">play()</button>
  <button id="pause">pause()</button>
  <button id="reverse">reverse()</button>
  <button id="resume">resume()</button>
  <button id="stagger">play("stagger")</button>
  <button id="restart">restart</button>
</div>
<div id="sliderWrapper">
<div id="slider"></div>
</div>
</div>
CSS
body, h1, h2, h3, p {
  font-family: Arial, Helvetica, sans-serif;
  margin: 0;
  color: #fff;
}

body {
  background-color:#000;
}

h1 {
  position: relative;
  margin-top: 10px;
  font-size: 36px;
  font-weight: normal;
}

h2 {
  position: relative;
  font-size: 22px;
  font-weight: normal;
  color: #cfcfcf;
}

#demoWrapper {
  width: 600px;
  height: 350px;
  -webkit-font-smoothing: antialiased;
  color: black;
  margin:auto;
}
#bg {
  position: absolute;
  width: 800px;
  height: 350px;
}
#content {
  padding-left: 15px;
  visibility: hidden;
}
#info {
  margin-top: 20px;
}
#feature {
  position: relative;
  float: left;
}
#description {
  position: relative;
  float: left;
  margin-left: 20px;
  width: 290px;
  font-size: 16px;
  line-height: 24px;
}
#nav {
text-align:right;
  margin:20px 10px;
}
#nav img {
  text-align:center;
  position: relative;
  margin-right: 20px;

}
button {
  padding: 10px;
  margin-top: 10px;
}

button:nth-child(1){
  margin-left:10px;
}

#slider{
  width: 580px;
  margin:10px auto;

}

.ui-widget-content {
  background-color:rgba(255, 255, 255, 0.2);
}
JS
var head = $("h1"),
      content = $("#content"),
    subhead = $("h2"),
    feature = $("#feature"),
    description = $("#description"),
    icons = $("#nav img");

TweenLite.set(content, {visibility:"visible"})

//instantiate a TimelineLite
var tl = new TimelineLite();

//add a from() tween at the beginning of the timline
tl.from(head, 0.5, {left:100, opacity:0});

//add another tween immediately after
tl.from(subhead, 0.5, {left:-100, opacity:0});

//use position parameter "+=0.5" to schedule next tween 0.5 seconds after previous tweens end
tl.from(feature, 0.5, {scale:.5, autoAlpha:0}, "+=0.5");

//use position parameter "-=0.5" to schedule next tween 0.25 seconds before previous tweens end.
//great for overlapping
tl.from(description, 0.5, {left:100, autoAlpha:0}, "-=0.25");

//add a label 0.5 seconds later to mark the placement of the next tween
tl.add("stagger", "+=0.5")
//to jump to this label use: tl.play("stagger");

//stagger the animation of all icons with 0.1s between each tween's start time
//this tween is added
tl.staggerFrom(icons, 0.2, {scale:0, autoAlpha:0}, 0.1, "stagger");

/* --- Control playback methods --- */

$("#play").click(function() {
        tl.play();
});

$("#pause").click(function() {
        tl.pause();
});

$("#reverse").click(function() {
        tl.reverse();
});

$("#resume").click(function() {
        tl.resume();
});

$("#stagger").click(function() {
        tl.play("stagger");
});

$("#restart").click(function() {
        tl.restart();
});

//when the timeline updates, call the updateSlider function
tl.eventCallback("onUpdate", updateSlider);

$("#slider").slider({
  range: false,
  min: 0,
  max: 100,
  step:.1,
  slide: function ( event, ui ) {
    tl.pause();
    //adjust the timeline's progress() based on slider value
    tl.progress( ui.value/100 );
    }
});

function updateSlider() {
  $("#slider").slider("value", tl.progress() *100);
}

tl.progress(1)
Attach
TimelineLiteJS.zip42.29 KB
Bạn thấy bài viết này như thế nào?


Add new comment